
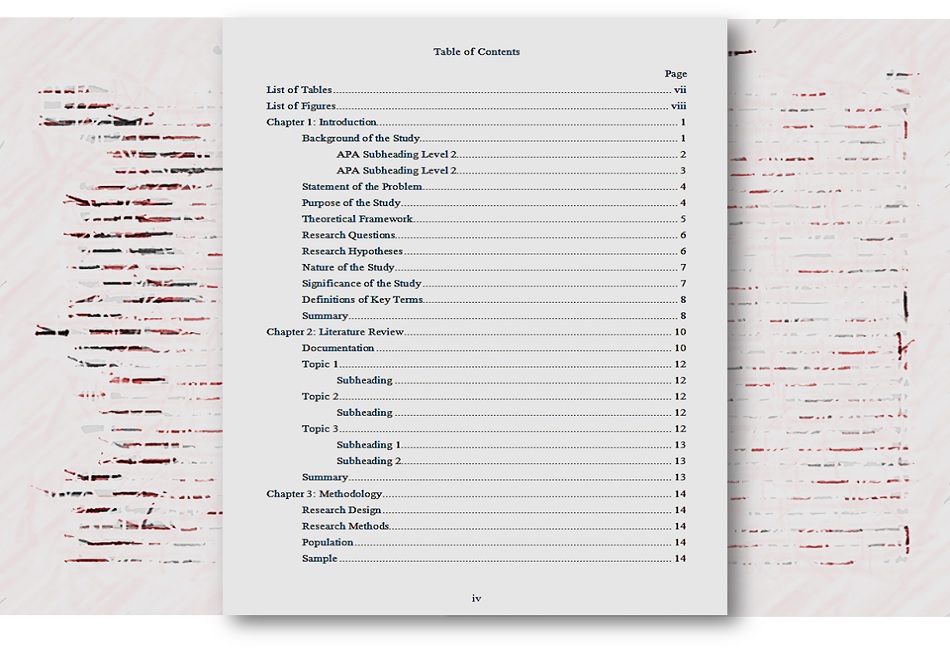
A table of contents is an essential element of your proposal. All long documents must have a table of contents. It is placed in the front matter of the paper, before that crucial section break that separates the front matter from the body of the paper. We (Microsoft Word and I) fondly call it the TOC.
Let me say right now, never type a TOC! Let Word do the work for you. Seriously! I’m not joking. I don’t care what your institutional guidelines say. You can break the links later and format it to meet the institutional standard, but first, let Word do the heavy lifting. Once you’ve set all your headings and subheadings with Word styles, it only takes a few seconds to generate the TOC. If you try to type it, it will be rife with errors as you continue to work on your paper. We are only human, after all, and Word is, well, Word is Word.
Before you insert a TOC, though, you must do one very important thing: set the Word styles for your headings and subheadings.
Step 1: Apply Word styles
Your TOC is based on Word styles. Word styles are rich, complex … and mysterious, but that doesn’t mean we should ignore them. We need Word styles. You need them, I need them, all academic writers need them. If you can bring yourself to learn the basics of Word styles, then maybe you won’t have to fork over $500 to get your dissertation formatted by a professional editor like me. I know learning Word styles doesn’t sound like a whole lot of fun, but it might not be as bad as you fear.
In the upper right corner of your Word window, in the STYLES command group, look for a dinky barely visible arrow ( Figure 1). Click it.

Figure 1. Open Word’s Style task pane.
A task pane will open along the right side of your Word window. It might look similar to the one in Figure 2, although it might show more or fewer styles, depending on the number of styles in your document and how your task pane is configured.

Figure 2. Word’s Style task pane (yours may look different).
Some heading styles are “built-in” to Word, but you can modify them. Heading levels start with Heading 1 (the highest level in your TOC). I’m not sure how many heading levels you can have, but I guarantee, for a typical dissertation, you will probably need only four. Maybe three, depending on how your institution guidelines determine the heading levels.
To apply a heading style, click anywhere in a line of text (or select the text) and click the heading level you want in the Style task pane. If you see some but not all the heading levels you want, click the Options button in the lower right corner of the Styles task pane and choose “Show next heading when previous level is used.” Word will always show you one level higher than the last level you applied.
Figure 3 shows a sample page of heading levels.
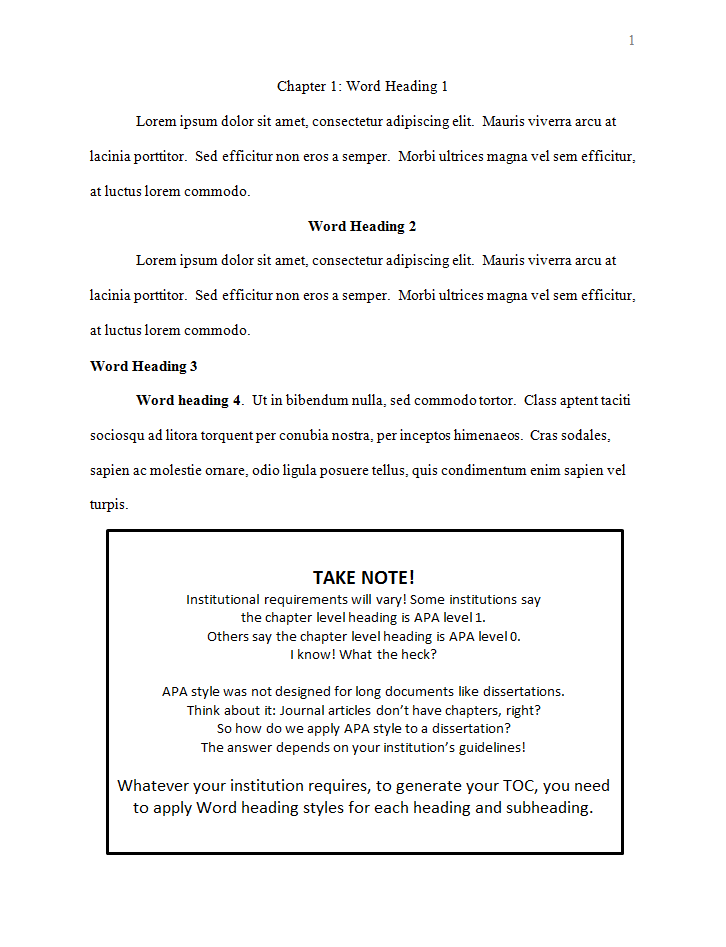
Figure 3. A sample page of Word heading levels
After you have applied your heading levels (Heading 1, 2, 3, and so on), Word can generate an accurate TOC. Open the Navigation pane (Click “Find” or Control+F). The Search pane has three tabs: Navigation is the tab on the left. You should see an outline view of all your main headings and subheadings (usually levels 1 and 2; see Figure 4). This is a preview of your TOC!

Figure 4. The Navigation pane shows main heading levels
Now finally, you are ready to insert your Table of Contents!
Step 2: Insert the Table of Contents
Before you insert your Table of Contents, note this: Wherever your cursor is, that is where your Table of Contents will appear, so make sure you insert it on the right page.
Find the TABLE OF CONTENTS button over on the left side of the REFERENCES RIBBON (Figure 5). You can just click it, but for most dissertations, that won’t be good enough (incorrect formatting).
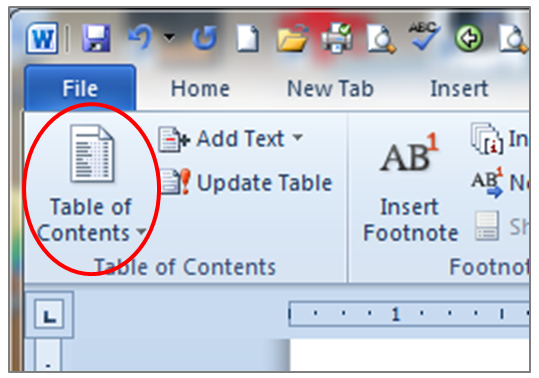
Figure 5. Inserting the TOC—step 1
Click the DROP-DOWN ARROW and choose INSERT TABLE OF CONTENTS (Figure 6).
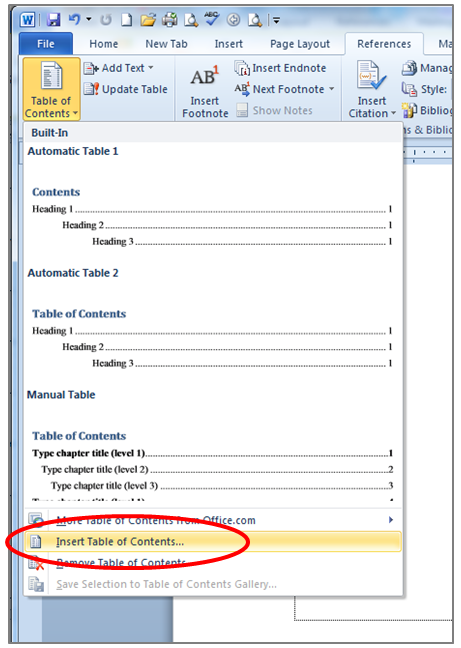
Figure 6. Inserting the TOC—step 2
The Table of Contents dialog box appears. Unless you have special formatting requirements, leave everything checked (show page numbers, right-align page number, show tab leader dots, from template, show three levels, and use hyperlinks instead of page numbers). If you set the heading styles correctly, you won’t need to click the OPTIONS button. Instead, choose MODIFY (Figure 7).

Figure 7. Inserting the TOC—step 3
Figure 8 shows a cascade of dialog boxes. Don’t freak out. This is the process we use to set the formats for each TOC level, one at a time.
The box at the far right is the original box shown in Figure 7. When you click MODIFY, the box in the middle comes up. This is where you choose what level you want to modify, starting with TOC 1. Click MODIFY.
The box on the left should be familiar if you have ever formatted a paragraph in Word. This is the place where you modify styles—line spacing, alignment, paragraph spacing—all that good stuff.
Your institution will have specific line spacing guidelines. This is where you can set double-spacing or single-spacing with a set amount of paragraph spacing before or after. Follow your institution’s guidelines.

Figure 8. Inserting the TOC—step 4
Figure 9 shows a typical format for TOC level 1.

Figure 9. Inserting the TOC—step 5
Now you are ready to format TOC level 2. When you click OK, you are returned to the middle box from Figure 7. Choose TOC 2. Click MODIFY (Figure 10). Set the indent for the second level of your TOC. Many institutions require a half-inch indent for each level. Some only require a quarter inch. Follow your institution’s guidelines.

Figure 10. Inserting the TOC—step 6
Remember, wherever your cursor is, that is where your Table of Contents will appear, so make sure you insert it in the right place. If you aren’t happy with it, follow the steps from Step 1 (insert Table of Contents) and go through the process again. Word will ask you if you want to replace the existing TOC. Say yes, otherwise you’ll end up with two. Figure 11 shows a finished TOC, with nonprinting characters showing so you can see how Word automatically inserted leader dot tabs and right-aligned all the numbers.
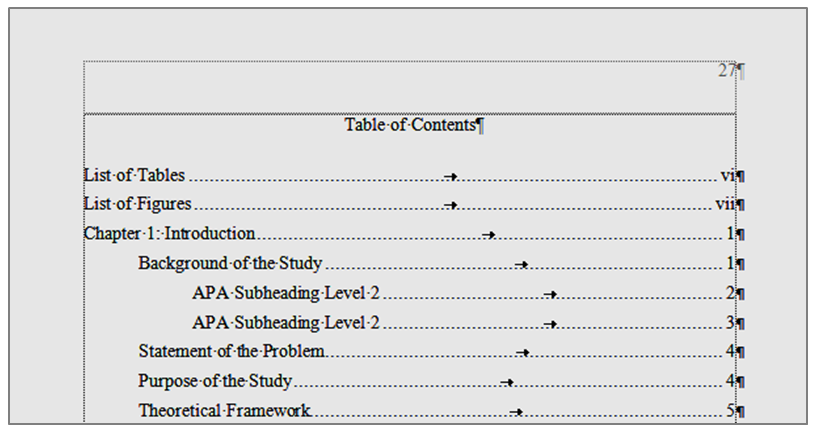
Figure 11. The finished Table of Contents (with nonprinting characters showing)
If you are feeling confident with styles, to save some time, you can choose TOC 1, TOC 2, TOC 3, etc. (one at a time) in the Styles task pane, right click on the style, and choose MODIFY to modify the formatting of each level. Formatting changes are immediate.
To update your Table of Contents
Pagination happens. To update your TOC to reflect revisions to your headings and page numbers, click anywhere in your TOC and press F9 (or right-click, choose UPDATE FIELD). Update often, and don’t forget to update the TOC before you submit your paper.
To delete your Table of Contents
Select the entire TOC and press the DELETE button.
You can find more information about using Word to format your dissertation in my book.

print: http://amzn.to/2emI0A1
kindle: http://amzn.to/2jeqpIZ