
Dissertators often have trouble formatting their documents to comply with the format and style requirements dictated by their institutions. Many dissertators fail to comply with the requirements of their style guides. Further, many dissertators don’t know how to use Word styles and waste valuable time formatting content (e.g., headings) individually instead of setting styles one time and applying with a click wherever they are needed. That means formats are applied inconsistently or incorrectly throughout their papers. Incorrect heading styles can derail your chances of getting approvals for your dissertation proposal or manuscript.
What is a style and why should we care?
In terms of fashion, style is one of those things we either have or we don’t (are you old enough to remember bellbottoms and hot pants?) In terms of academic style, though, style is available to anyone motivated enough to spend time with a style manual. A style manual is a book showing the formatting and writing requirements for specific disciplines. The two most common style guides in the humanities and social sciences are APA (American Psychological Association) and CMS (Chicago Manual of Style)/Turabian. The social sciences include psychology, business, and education.
American Psychological Association (APA)
Most social science dissertators are required to use the Publication Manual of the American Psychological Association (fondly known as APA). APA publishes this manual periodically to help academic authors write and format their documents. Currently, we are enjoying the sixth edition of this manual, published in 2010. When we talk about APA style, we are referring to the guidelines in the APA style manual. You can find information about the APA style manual on the APA website. [https://www.apa.org/] The manual can be purchased at most bookstores, and you can find used copies on Amazon and at your local library. APA maintains a helpful blog.
“When editors or teachers ask you to write in APA Style®, they are referring to the editorial style that many of the social and behavioral sciences have adopted to present written material in the field. APA Style was first developed in 1929 by a group of social scientists who wished to establish sound standards of communication. Since that time, it has been adopted by leaders in many fields and has been used by writers around the world.” (APA, n.d., para. 8)
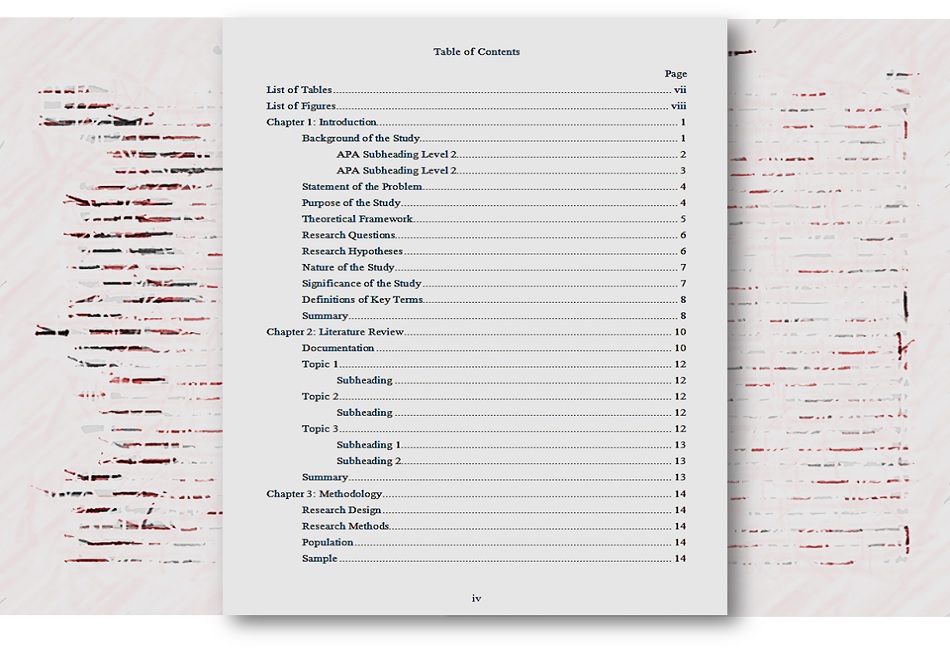
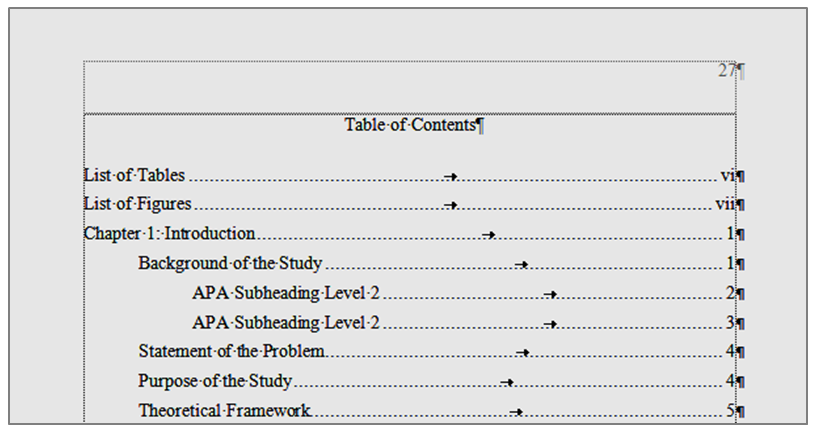
What are APA Heading Levels?
Level 1: centered, bold, uppercase/lowercase (UC/LC)
Level 2: Flush left, bold, UC/LC
Level 3: Indented bold, LC, ending with a period (paragraph heading)
Level 4: Indented, bold, italic, LC, ending with period (paragraph heading)
Level 5: Indented, italic, LC, ending with period (paragraph heading)
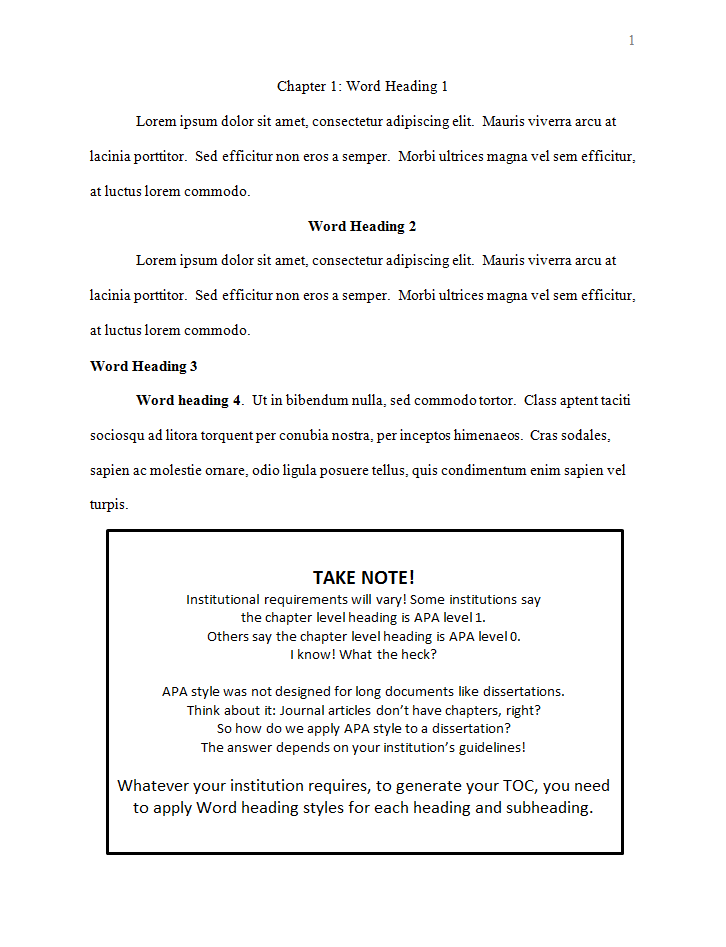
Many institutions add a Level 0 to account for chapter title headings. That means the first APA heading level would be Level 1. Check with your institution’s guidelines before you format your paper with a Level 0 heading style.
See APA 6th ed., section3.03, p. 62 for examples.
Here’s something you may not realize: The APA manual (6th ed.) applies to journal articles, not to long documents like dissertation proposals and manuscripts. This means that institutions, departments, Committees, and Chairs interpret (and revise) APA style guidelines for long documents, leading to style inconsistencies.
As an editor, I see many adaptations of APA style. No matter what is indicated in the APA style manual, always follow your institution’s guidelines. The style guide takes precedence only in the absence of other direction. Your institution’s handbook, departmental templates, and personal preferences of your Committee and your Chair take precedence over the style guide. Many institutions have very specific formatting requirements. If you fail to comply, approval of your proposal may be delayed.
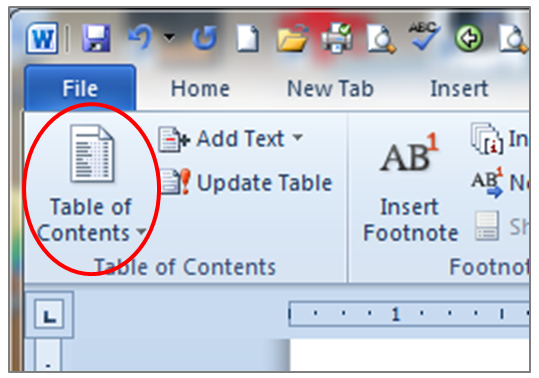
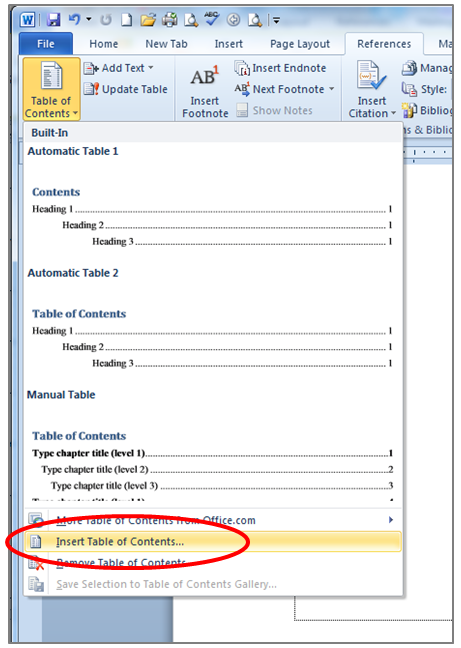
Applying APA style using Word styles
Whether we use Mac or PC versions, most of us use Microsoft Word to write our papers. Word is a software program produced by Microsoft. Microsoft is not affiliated with the American Psychological Association. When we talk about Word styles, we are referring to the commands we can apply to format (or style) elements of our document.
Using Word, we format our headings to comply with APA style or the style our institution requires us to use. It would be nice if we could just click Heading 1, Heading 2, and so on, to format our headings. Unfortunately, as you probably know, the built-in heading styles that come with Word do not comply with APA heading styles.
However, we can modify existing Word styles and add new styles to meet our needs. The most effective method of formatting headings in Word is to use Word styles to format headings to comply with APA heading styles. That is what I’ve done in these templates. You can purchase a preformatted Word template for only $0.99.
Suggestions
- Get a copy of the most recently published style manual for your institution and program.
- Read the style manual carefully. Compare it to your institution’s handbook and dissertation template. Note discrepancies.
- When the style manual conflicts with your institution’s handbook, follow your institution’s handbook.
- Download a template to avoid wasting time struggling with Word and APA style.
Sources
APA (American Psychological Association). (2010). Publication Manual of the American Psychological Association Washington, DC: Author. More information
==========================================
Books and resources from Love Your Dissertation
Resources
Eguides (free)
Worksheets (free)
Word Templates ($0.99 each)
Books
Applying Theory
Dissertators often struggle to choose and apply a theoretical framework to their research projects. In this helpful guide, I offer suggestions from my own experience. In addition, I reveal how other dissertators have applied theory successfully and earned their doctorates. Written in a friendly, nonscholarly manner, I demystify the challenges of applying academic theory to a research project. You will learn that theory is nothing to fear—in fact, we all use theory all the time! With the help of this powerful little book, you will learn to master theory and achieve your dream of earning your Ph.D.
Print version $15.99
Kindle version $7.99
Coming in 2019
Aligning the Elements
In the second book of the Desperate Dissertator Series, I dig into a common problem dissertators face when preparing their proposals: aligning the elements of the dissertation. The elements of the dissertation usually include the problem statement, the purpose statement, the research questions, the theoretical framework, and the methodology and methods. Aligning these elements means ensuring they logically flow from one to the next. Lack of alignment is possibly the main reason proposals are not approved. In this book, I offer some tips to help you align the elements and show what other dissertators have done to succeed (it could be easier than you think).
Resubmit! 28 ½ Reasons Why You Can’t Get Your Dissertation Proposal Approved

This comprehensive book is the missing link for dissertators who have struggled to get their proposals approved. This indispensable book bulges with insights, suggestions, examples, diagrams, and practical tips, written especially for the online dissertator who may receive little support during the proposal process. I present solutions to address twenty-eight potential reasons why you might be struggling to get your proposal approved. For example, you will learn how to write a clear problem statement, devise research questions and hypotheses, and align the elements of the proposal to facilitate speedy approval. I unlock the mysteries of Word and Excel to show you specifically how to use these tools for your proposals. Over 200 tables and figures show you exactly what to do. As a bonus, you will learn how to design a web-based survey and make a plan for fielding and analyzing the data. In this book, I cover it all to help you overcome obstacles and finish your dissertation.
Free templates and worksheets are available here.